Getting Started with Rustlang & WebAssembly
Get Started with Rust and WASM Web Applications


Why Rust? 🦀
Rustlang (Rust for short) is a general purpose and multi-paradigm software language that focuses on a superior type system and performance optimization. It is statically-typed, making it syntactically similar to C and C++. Originally created to address the memory and security pitfalls of languages like C++, Rust was originally created in 2010 by Graydon Hoare, a software developer at Mozilla, and is now open-sourced.
For the last eight years, Rust has won the top title for 'Most Beloved Programming Language' according to Stack Overflow's annual Developer Survey in 2021 and remains an "Admired and Desired" language in 2022 and 2023.
I fully understand this hype after programming in Rust! The syntactic memory safety of it's inclusive static typing system, it's feature-rich ecosystem, detailed error messaging, and interoperability with developer environments make this an excellent language for any developer to try.
Why Rustlang and WebAssembly?
WebAssembly (WASM for short) is a fast, safe virtual machine designed to function as portable compilation target that enables more programming languages to deploy on the web for client and server applications.
The Rust team focuses on using WASM to combine Rust with an existing JavaScript frontend, although some web applications are built entirely in Rust, such as yew.
The benefit of this stack is superior flexibility by using Rustlang and JavaScript together. Learn more about if Rustlang is suitable for web development: arewewebyet.org.
Let's Get Started!
This tutorial is for getting started with Rustlang on Mac and Unix. If using Windows, I recommend following these instructions.
Make sure that your IDE is properly configured for Rust. Here are Rust configuration guides for VSCode and IntelliJ.
In this tutorial, we build a package using wasm-pack, a tool for building JavaScript packages in Rust. To target the frontend, we will use WebAssembly. This tutorial builds into a CRUD project using SQLx and doesn't focus on teaching Rust, for that I recommend the Rust Programming Book.
Install Rust Toolchain
Rustup
To install Rust, use 'rustup'. Rustup is a Rust toolchain installer and version management tool. Install rustup by running this command in your terminal:
curl --proto '=https' --tlsv1.2 -sSf https://sh.rustup.rs | sh
If rustup is already installed on your system, make sure to run rustup update to install the latest updates.
In the Rust development environment, tools are installed in your ~/.cargo/bin directory. Here you will find the Rust toolchain, such as cargo. Upon installation, Rustup will attempt to configure your environment variable PATH. This may not take into effect immediately, your machine may require a restart or you may need to configure this environmental variable manually depending on your operating system.
Run rustc --version to verify it's installation.
Cargo
Cargo is the premier Rust package manager, and is installed automatically with Rustup.
You may run cargo --version to confirm it's installation.
To build a new Rust package with Cargo, run cargo new:
cargo new hello_world
cd hello_world
By default, Cargo generates 1 directory and 2 files:
.
├── Cargo.toml
└── src
    └── main.rs
The cargo.tml file is a manifest file, similar to Gemfiles in Ruby or package.json in npm. It contains all of the metadata that Cargo needs to compile your Rust package. By default, Cargo generates a “hello world” program for us..
Compile your hello world program by running:
cargo build
This will generate a Cargo.lock file and target directory, containing more metadata and your cache for each run. The
After building, run the program:
./target/debug/hello_world
  Hello, world!
Or you can use cargo run to compile and then run it, all in one step:
cargo run
     Fresh hello_world v0.1.0 (file:///path/to/package/hello_world)
   Running `target/hello_world`
Hello, world!
For reference, Cargo is the rust build tool and package manager:
build your project with
cargo buildrun your project with
cargo run
WebAssembly
To build a WASM package with Rust, use cargo to install wasm-pack which helps compile code to WebAssembly:
cargo install wasm-pack
To create a new WASM package in Rust, use cargo new again:
cargo new --lib hello_wasm
cd hello_wasm
The --lib flag means you are crating a Rust package library. In Rust, there are two main package layouts -- binaries and libraries. Binaries are executables you can run, while libraries are used as dependencies by other projects.
This will create a new Rust package library with everything you need for a "hello world" web application in Rust and WebAssembly:
├── Cargo.toml
└── src
    └── lib.rs
To run our first program, replace the code in lib.rs with the following:
use wasm_bindgen::prelude::*;

#[wasm_bindgen]
extern {
    pub fn alert(s: &str);
}

#[wasm_bindgen]
pub fn greet(name: &str) {
    alert(&format!("Hello, {}!", name));
}
wasm bindgen is a Rust library and CLI tool for facilitating high-level functionalities between wasm modules and JavaScript.
Next, edit your Cargo.toml file, making sure to include wasm-bindgen as a dependency:
[package]
name = "hello_wasm"
version = "0.1.0"
authors = ["Your Name <you@example.com>"]
description = "A sample project with wasm-pack"
license = "MIT/Apache-2.0"
repository = "https://github.com/yourgithubusername/hello-wasm"
edition = "2018"

[lib]
crate-type = ["cdylib"]

[dependencies]
wasm-bindgen = "0.2"
Next, we build the package using wasm-pack:
wasm-pack enables building, testing, and publishing Rust-generated WebAssembly. rustwasm.github.io/docs/book/game-of-life/s.. cargo generate.
wasm-pack build --target web
This may take some time, meanwhile you can read from the list of helpful resources below. :)
wasm-pack build will complete the following steps:
Compile your Rust code into wasm.
Run
wasm-bindgen, generating a JavaScript file that wraps up that wasm file into a module for the browser to read.Create a
pkgdirectory and move that JavaScript file and your wasm code into it.Read your
Cargo.tomlto produce an "equivalent package.json" file.
Build Web App
Finally, to get started with the web, you will need to create an index.html file and set up your own local testing server.
In the index.html file, we will import the JavaScript code, initialize the wasm module, and call a Rust function called greet:
<!DOCTYPE html>
<html lang="en-US">
  <head>
    <meta charset="utf-8" />
    <title>hello_wasm example</title>
  </head>
  <body>
    <script type="module">
      import init, { greet } from "./pkg/hello_wasm.js";
      init().then(() => {
        greet("WebAssembly");
      });
    </script>
  </body>
</html>
Note: older browsers may not have support for understanding wasm!
Run local server
To run your own simple local server, I prefer using Python:
python3 -m http.server
Learn more about running local servers with Python: developer.mozilla.org/en-US/docs/Learn/Comm..
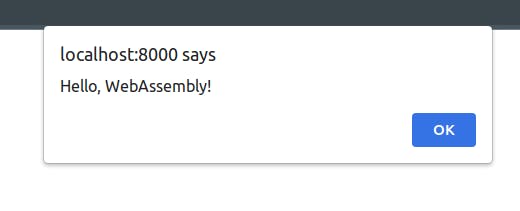
You should see your wasm web application when navigating to localhost:8000 on your browser. Voila! You have written two "hello world" applications -- one in plain Rustlang, and another using wasm and Rustlang to target the web!
Note: You may need to comment out the webpack loader in hello/_wasm.js.
--